


Free Measure & Quote
We bring our mobile showrooms directly to the comfort of your home
Enter your postcode to find your local Beare Flooring specialist, choose a date & time that suits – it’s that easy!
 Fact Checked
Experience Based
Published on March 11, 2025.
Fact Checked
Experience Based
Published on March 11, 2025.
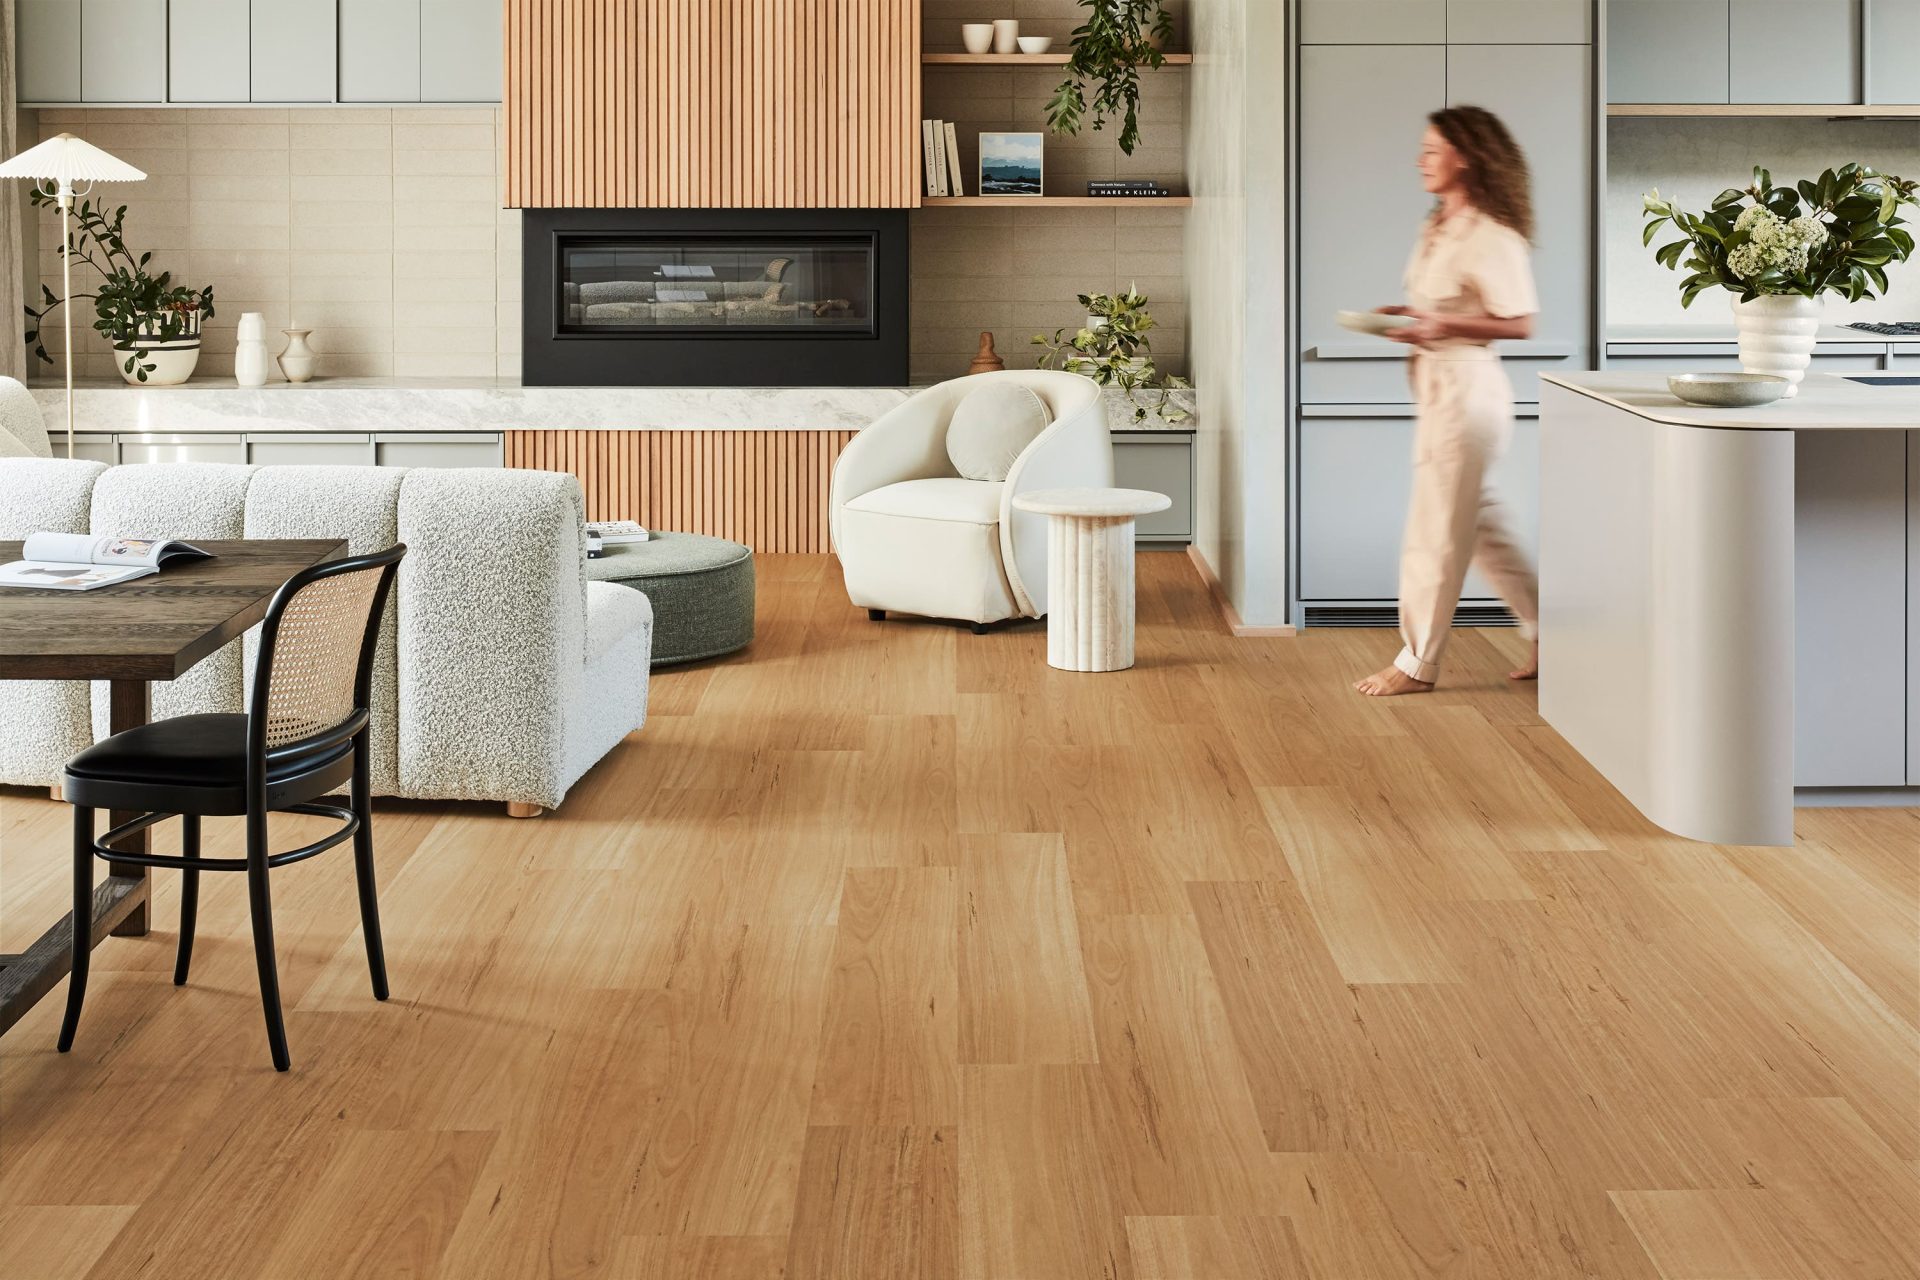
Vinyl flooring is a popular choice for Australian homes, and for good reason. It’s durable, easy to clean, and fits into nearly any space with style. Whether you’ve chosen vinyl plank, tile, or sheet vinyl, the key to making it last is proper cleaning and care.
Even though vinyl is known for being low-maintenance, using the wrong cleaning method—or the wrong floor cleaner—can scratch the surface, cause discolouration, or reduce the floor’s lifespan. From avoiding excess water to choosing a vinyl floor cleaner that’s specifically designed for vinyl, every small habit matters.
This guide walks you through seven smart tips to help clean your vinyl floors the right way. These practical techniques are easy to follow and will keep your vinyl looking its best without harsh chemicals. Whether you’re after a daily cleaning routine or a full deep clean, here’s how it works.
Before you begin any cleaning routine, it helps to know what kind of vinyl floor you’re working with. Different types of vinyl respond better to different cleaning methods, and knowing what’s safe to use on vinyl will help you avoid accidental damage and keep your floor looking great for years to come.
Vinyl flooring typically comes in three main types:
While they all offer excellent durability and are generally easy to clean, they can vary in how seams and edges are sealed.
For example, vinyl plank and tile options often feature click-lock edges or adhesive backing, which means excess water during cleaning could seep between the boards and cause lifting or warping. Sheet vinyl, on the other hand, is usually installed in one large, seamless piece, making it more resistant to water exposure but still not immune to damage from strong cleaning agents or abrasive tools.
No matter which style you have, the basics of vinyl floor cleaning remain the same: remove loose dirt first, use a cleaner specifically designed for vinyl, and avoid anything that could scratch the floor or leave residue.
Understanding your material is the first step to keeping your floors looking their best without shortening their lifespan.
Keeping dirt and debris off your vinyl flooring is one of the most important parts of routine care. Small particles like dust, sand, or pet hair might seem harmless but over time, they can scratch the surface and dull the finish. That’s why regular sweeping or vacuuming is key to maintaining the floor’s appearance and longevity.
Use a soft-bristle broom or a vacuum that’s safe to use on vinyl. Avoid using any vacuum head with a beater bar or rotating brush, as it can scratch the surface. Stick to settings made for hard floors, which are gentler while still picking up dirt effectively.
For best results, aim to sweep or vacuum high-traffic areas daily, especially near entryways where grit gets tracked in. In lower-traffic rooms, a few times a week will usually do. This simple habit forms the foundation of good vinyl flooring maintenance and makes deep cleaning much easier down the track.
Not only does regular sweeping help protect the surface, it also means you won’t have to mop the floor as often, reducing the risk of moisture damage. If you’re using a vacuum, always check that it’s safe for vinyl plank flooring to avoid long-term wear.
Choosing the right cleaning solution makes all the difference when it comes to maintaining your vinyl flooring. Many off-the-shelf products contain harsh chemicals like ammonia or bleach, which can strip the finish, leave streaks, or discolour the surface. To avoid damaging your floors, always use a cleaner specifically designed for vinyl or a mild, pH-neutral option.
If you prefer a homemade approach, a simple vinegar and water solution works well. Mix one cup of white vinegar with a bucket of warm water for an effective cleaner that’s gentle but strong enough to cut through grime. For oily spots or heavier build-up, adding a couple of drops of dishwashing liquid can help without leaving a soapy film. Just remember to rinse the floor with clean water after mopping to prevent residue and dry the floor with a clean cloth or mop.
Always avoid using abrasive cleaning products or tools, as these can scratch the floor and degrade the protective layer over time. A soft mop or sponge mop combined with a gentle cleaning solution will give you the best results and help keep your vinyl in great condition.
Whether you’re doing a quick weekly clean or a more thorough floor cleaning, using the right cleaner is one of the easiest ways to protect your floors and keep them looking their best.
Vinyl flooring may be water-resistant, but it’s not waterproof. One of the most common mistakes homeowners make when cleaning vinyl is using too much water. Excess water can seep into the seams and edges, especially with vinyl plank or tile flooring, leading to lifting, warping, or damage to the subfloor beneath.
The best way to clean vinyl floors is with a damp mop—not a soaking wet one. Wring out your mop thoroughly before you apply it across the floor, and avoid leaving puddles or letting water pool. After mopping, always dry the floor with a soft towel or clean dry mop to remove any leftover moisture.
For daily cleaning, a light damp mop and a pH-neutral cleaner will be more than enough. If you’re doing a deeper clean, mop the floor in small sections and make sure you rinse the floor with clean water as you go, especially if you’ve used a cleaning product.
Avoid using steam mops altogether. While they might seem like a convenient option, the intense heat and moisture can cause long-term damage and break down the adhesive used in vinyl plank or sheet vinyl installations.
By managing moisture properly, you’ll not only maintain the floor’s appearance but also extend its life—keeping your vinyl floors looking their best for years to come.
No matter how careful you are, spills happen. Whether it’s water from the sink, juice from the kids, or oil splattered while cooking, quick action is essential when it comes to vinyl flooring. Even though vinyl is designed to be resistant to moisture, allowing a spill to sit too long can lead to staining or, worse, water seeping into seams and edges.
The best approach is to clean the area as soon as the spill occurs. Use a soft, absorbent cloth or paper towel to blot the spill—don’t rub, as this can spread the mess or grind particles into the surface. For sticky or greasy spills, a damp mop with warm water and a little pH-neutral vinyl floor cleaner will lift the residue without harming the floor.
For stubborn marks like dried food or drink, apply the cleaner and let it sit for a few minutes before gently wiping it away. Avoid using abrasive tools or scrubbing pads, as these can scratch the floor or wear down the protective layer.
Prompt attention to spills will prevent permanent stains on vinyl and ensure your floors stay clean and well-maintained, even in busy areas like kitchens and dining rooms.
Some parts of your home naturally get more wear than others. Entryways, kitchens, hallways and living rooms tend to collect more dirt and grime simply because they’re used more often. Over time, this constant foot traffic can wear down the surface of your vinyl flooring, making it look tired before its time.
To keep your vinyl looking fresh, it’s worth adding a few simple layers of protection. Start with floor mats at entrances to reduce the amount of dirt and debris being tracked inside. Choose mats without rubber or latex backing, as these can discolour vinyl over time. Look for rugs with a felt or woven backing that’s safe to use on vinyl.
In areas like the kitchen or laundry, where you’re standing frequently, use soft rugs or runners to help reduce wear and cushion the floor. Not only do they protect the surface, but they also make standing for long periods more comfortable.
In addition to mats and rugs, keep up a regular cleaning routine in these zones. Weekly cleaning with a vacuum or soft-bristle broom will help stop dirt from building up, and a damp mop with a suitable vinyl floor cleaner will keep everything looking its best.
These simple steps will help protect your floors from daily wear, extend their lifespan, and keep your flooring looking its best in the areas where it matters most.
Vinyl floors are tough, but they’re not immune to damage. One of the easiest ways to accidentally ruin the surface is by using abrasive tools or scrubbing too hard when cleaning. Scuff marks, scratches, and dull patches can all result from rough treatment, making your floors look worn out well before their time.
Avoid using steel wool, stiff-bristled brushes, or scouring pads on your vinyl. These tools can scratch the floor and strip away its protective wear layer. Instead, use soft microfibre cloths, sponge mops, or soft-bristle brushes that are safe to use on vinyl. These gentler options are still effective at lifting dirt and grime without harming the finish.
If you’re dealing with a stubborn mark or scuff, apply the paste using baking soda and warm water. Let it sit for a few minutes to break down the grime, then gently wipe it away using a soft cloth. Always rinse the floor with clean water afterwards to remove any residue and dry the floor to prevent streaking.
Using the right tools is just as important as using the right cleaner. It ensures you maintain the floor’s appearance and prevent unnecessary wear from cleaning alone. With the right care and maintenance, your vinyl floor will stay looking fresh and clean without the need for strong cleaning or aggressive scrubbing.
One of the most overlooked parts of vinyl flooring maintenance is protecting it from your furniture. Moving chairs, tables or appliances across the floor without any padding can leave behind scuff marks, dents or even scratches that are difficult to repair. The good news? It’s easy to prevent with the right protection.
Attach felt pads or rubber floor protectors to the legs of furniture, especially chairs that get dragged or shifted often. These small pads create a buffer between the furniture and the vinyl surface, reducing the risk of scratches and pressure marks. For heavier items like couches, fridges or bookshelves, consider placing them on non-slip mats or felt-backed sliders.
If you need to move furniture across the floor, lift it instead of dragging it. Sliding a heavy object across the floor can scratch the surface or cause deep marks that no cleaner will fix. Even better, plan ahead and place protection under furniture legs from the start—especially on vinyl plank flooring, where dents and edge pressure can be more noticeable.
Regularly check and replace any worn or dirty pads. Grit caught in old protectors can end up doing more harm than good. These small steps go a long way toward protecting your floors and keeping your vinyl looking clean, smooth and free from unnecessary wear.
If you prefer to avoid harsh chemicals or simply want a budget-friendly option, a homemade cleaning solution is a great choice. One of the best ways to clean vinyl floors naturally is with a simple vinegar and water mix. It’s safe to use on vinyl, cuts through grime effectively, and leaves your floors looking clean without residue.
To make your own DIY vinyl floor cleaner, combine:
1 cup of white vinegar
4 to 5 litres of warm water
(Optional) A few drops of mild dishwashing liquid for added grease-cutting power
Use a damp mop to apply the solution across the floor. This mixture is especially effective for routine cleaning and is gentle enough for regular use. If you’re dealing with a slightly more stubborn build-up, you can let the solution sit on the area for a minute or two before mopping it up.
After cleaning, rinse the floor with clean water to ensure no residue is left behind, then dry the floor using a soft cloth or dry mop. This step is especially important for vinyl plank and tile floors, where moisture can seep into the joints if left unattended.
This vinegar and water solution is a safe, effective cleaning method that helps maintain the floor’s appearance without damaging the finish. It’s a simple part of your weekly cleaning routine that keeps your floors looking fresh and avoids the need for strong cleaning chemicals.
Even with the best intentions, it’s easy to make small cleaning choices that end up causing damage over time. Avoiding these common mistakes will go a long way in protecting your vinyl flooring and ensuring it stays in top condition.
Soaking the floor when you mop might seem like a thorough way to clean, but excess water can seep into edges and seams, especially with vinyl plank flooring. Over time, this can lead to lifting, curling, or damage to the subfloor. Always use a damp mop and dry the floor immediately after cleaning.
Avoid using bleach, ammonia, or anything highly alkaline. These harsh chemicals can break down the surface layer of your vinyl and cause fading or cracking. Always choose a pH-neutral cleaner specifically designed for vinyl, or make your own solution using white vinegar and warm water.
Scouring pads, steel wool, and stiff brushes might seem effective for stubborn spots, but they’ll scratch the floor and wear down its finish. Stick to soft cloths, sponge mops, or tools made for hard floors to keep your floor looking clean without damage.
Waiting too long between cleans allows dirt and grime to build up, which can dull the finish and scratch the surface. Regular sweeping, vacuuming, and damp mopping help prevent this. A consistent cleaning routine is key to keeping your floors looking their best.
Moving heavy furniture without protection is a sure way to scratch the surface. Always lift furniture or use felt pads or sliders, especially during cleaning or rearranging.
By avoiding these mistakes, you’ll protect the integrity of your vinyl flooring and reduce the need for repairs or early replacement. Small changes in your cleaning routine can make a big difference in the long-term maintenance of vinyl.
No. Steam mops are not safe to use on vinyl flooring. The high heat and moisture can weaken adhesives, cause seams to lift, and damage the surface over time. Stick to a damp mop with warm water and a pH-neutral cleaner for the best results.
The best cleaner is one that’s specifically designed for vinyl and labelled as pH-neutral. Avoid using harsh chemicals like ammonia or bleach. You can also make a safe and effective solution at home using white vinegar and water.
For most households, a weekly cleaning routine works well. Sweep or vacuum high-traffic areas daily to remove dirt and debris, then mop the floor weekly or as needed. Spills should be cleaned immediately to prevent stains on vinyl.
Yes, baking soda is safe to use on vinyl for spot cleaning. Make a paste with warm water and apply it to scuff marks or sticky residue. Let it sit briefly, then wipe with a soft cloth. Always rinse the floor after using baking soda to avoid residue.
Yes, in the right concentration. A mix of one cup of white vinegar to four or five litres of warm water makes an effective cleaner that won’t damage your floors. Always avoid using full-strength vinegar, and rinse the floor afterwards with clean water.
Avoid wax-based vinyl floor polish, which can cause build-up. Instead, maintain a clean surface with regular sweeping, gentle mopping, and using a cleaner safe to use on vinyl. Protect high-traffic areas with rugs and furniture pads to keep your floor looking good longer.
Book your free in-home measure and quote with Beare Flooring today. Our mobile flooring showroom brings a wide range of vinyl options straight to your door, so you can choose with confidence and get expert advice on cleaning and maintenance tailored to your home.
Get started now and enjoy beautiful, low-maintenance vinyl floors for years to come.
It’s incredibly easy to organise your complimentary measure and quote at a time that suits you. Our flooring specialists will bring our range of samples to your home and provide you with the friendly expert advice you need to make the perfect selection.
Book in your no-obligation measure and quote today.
We bring our mobile showrooms directly to the comfort of your home
Enter your postcode to find your local Beare Flooring specialist, choose a date & time that suits – it’s that easy!
Unsure on if you want to book a free in home consultation yet? That’s ok, give us a call to chat.
Want to speak to someone before confirming your appointment?